How to Train Your Dog to Accept a Baby Gate
Baby Gate Training Progress Tracker
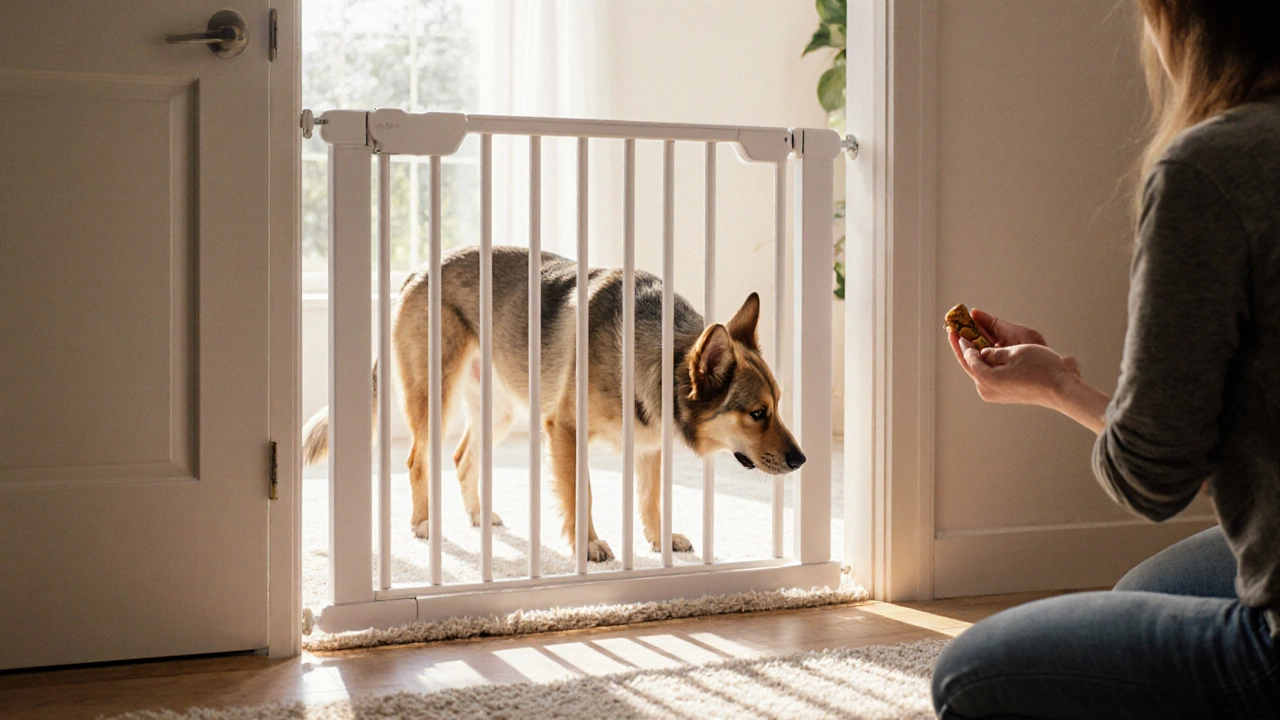
Pressure-Mounted Gate
Best for small to medium dogs. Easy installation, no tools required.
Weight limit: Up to 40 lbs
Hardware-Mounted Gate
Sturdy option for large dogs. Requires screwing into wall studs.
Weight limit: Up to 80 lbs
Training Progress
Start training to see your progress!
Training Steps
Step 1: Introduce the gate
Place the gate open or partially open in a neutral area. Let your dog sniff and investigate. Reward calm sniffing with a high-value treat.
Step 2: Teach "Stay" cue
Using a leash, guide your dog to stand a few steps away. Say a clear command like "Stay" and reward after a few seconds.
Step 3: Gradually close the gate
With the dog on "stay", slowly move the gate toward its closed position. Reward calm behavior immediately.
Step 4: Add "Go Through" cue
Once the dog tolerates the gate closed, open a small gap and say "Pass" or "Through". Use a treat on the other side to lure the dog through.
Step 5: Practice Independence
After several successful guided sessions, let the dog approach the gate on its own. Keep treats handy but fade them over time.
Congratulations!
Your dog has successfully completed all training steps for the baby gate. You're ready to manage the gate day-to-day!
Keep practicing the "stay" and "through" commands occasionally to maintain the behavior.
When a baby gate goes up, many dog owners wonder whether their four‑legged friend will bolt, bark, or simply ignore it. The good news is that with the right approach, most dogs learn to see the gate as a normal part of the home rather than a barrier to their favorite person.
Key Takeaways
- Pick a gate that matches your dog’s size and the room layout.
- Use positive reinforcement to create a calm association.
- Practice short, frequent sessions before leaving the gate unattended.
- Watch body language; intervene before stress spikes.
- Adjust the plan if your dog shows persistent fear or aggression.
Understanding Your Dog’s Reaction
Every Dog is a domesticated canine companion that responds to training cues and can form habits around household objects brings its own history to a new obstacle. Some dogs are naturally curious, others are protective of a specific room, and a few may have had a negative experience with a similar barrier in the past.
Key signals to watch for:
- Alert ears and stiff posture - the dog is assessing a potential threat.
- Whining or barking - indicates frustration or anxiety.
- Jumping or trying to breach the gate - may be excitement or a desire for access.
If you notice heavy panting, drooling, or a tucked tail, back off and lower the stakes. The goal is to keep the experience below the stress threshold.
Choosing the Right Baby Gate
A well‑fit gate reduces the need for intensive training. Here are three common types:
| Type | Installation | Weight Limit | Safety for Dogs | Typical Cost (USD) |
|---|---|---|---|---|
| Pressure‑Mounted | Fits between two walls, no tools | Up to 40lb | Easy to remove if dog pushes hard | 30‑50 |
| Hardware‑Mounted | Screwed into studs | Up to 80lb | Very sturdy; good for larger breeds | 50‑80 |
| Walk‑Through (with door) | Combination of pressure and hardware | Up to 70lb | Convenient for families; may need extra training for the latch | 70‑120 |
For most medium‑sized dogs, a pressure‑mounted gate works fine. If you have a large, strong dog (e.g., Labrador, German Shepherd), consider a hardware‑mounted or walk‑through model.
Step‑by‑Step Training Process
The core of dog baby gate training is to pair the gate with something your dog loves. Follow these five steps:
- Introduce the gate without pressure. Place the gate open or partially open in a neutral area. Let your dog sniff and investigate. Reward calm sniffing with a high‑value Treat a small, tasty bite that the dog finds irresistible.
- Teach a “stay” cue near the gate. Using a Leash a lightweight training leash that gives you control without pulling, guide the dog to stand a few steps away. Say a clear command like “Stay” and reward after a few seconds.
- Gradually close the gate. With the dog on “stay,” slowly move the gate toward its closed position. If the dog remains calm, reward immediately. If tension appears, open the gate back up and retry at a smaller increment.
- Add a “go through” cue. Once the dog tolerates the gate closed, open a small gap and say “Pass” or “Through.” Use a treat on the other side to lure the dog through voluntarily. Praise and reward for successful passes.
- Practice independence. After several successful guided sessions, let the dog approach the gate on its own. Keep treats handy, but start fading them after the dog consistently walks through without prompting.
Each session should last no longer than five minutes. Short, frequent practice beats a marathon once‑a‑week drill.
Creating a Safe Space Around the Gate
While training, designate a calm area near the gate where the dog can retreat if needed. A Crate a sturdy, comfortable enclosure that serves as a den for the dog or a soft mat works well. Having a fallback spot reduces the chance of panic when the gate is closed.
Managing the Gate Day‑to‑Day
Once the dog handles the gate in training, transition to real‑world use:
- Leave the gate up for short periods. Start with 5‑10minutes while you’re in the same room, then gradually increase as confidence builds.
- Supervise interactions with babies or toddlers. Even a well‑trained dog should be watched when a child is near the gate.
- Maintain the gate’s stability. Check screws or pressure points daily to prevent wobbling that could startle the dog.
- Refresh the cue. Occasionally practice the “stay” and “through” commands to keep the behavior sharp.
Common Pitfalls & How to Fix Them
Even with a solid plan, hurdles appear. Here are three frequent issues and quick fixes:
- Dog barks or whines every time the gate closes. Lower the stakes: keep the gate partially open and reward quiet behavior. Over time, increase closure depth.
- Dog tries to jump over the gate. Ensure the gate’s height is at least 6‑8inches above the dog’s shoulder. If jumping persists, add a short piece of fabric over the top to block the line of sight.
- Dog refuses to go through. Increase the value of the treat on the other side, or use a favorite toy as a lure. Practice “go” in a different room first to prove the concept.
What About Positive Reinforcement?
Positive reinforcement Positive Reinforcement a training method that rewards desired behavior to increase its frequency is the backbone of this entire process. Avoid punishment, which can turn a neutral gate into a source of fear. Celebrate each tiny win with praise, treats, or a short play session.
Frequently Asked Questions
Can I use a baby gate for a large dog like a Great Dane?
Yes, but choose a hardware‑mounted model with a high weight limit (70‑80lb). Test the gate’s stability by gently pushing it before leaving it alone.
My dog is scared of metal. Should I avoid metal gates?
If metal triggers fear, start with a wooden or plastic pressure‑mounted gate. Gradually expose the dog to the material using treats and praise, or cover metal parts with a soft fabric.
How long does it take for a dog to get comfortable with a gate?
Most dogs adapt within 1‑2 weeks of short, daily sessions. Some may need a month if they have a history of anxiety.
Should I keep the gate closed when the baby is sleeping?
Yes, as long as the dog is calm around it. A closed gate adds a physical barrier that protects both baby and dog during nap time.
What if my dog tries to chew the gate?
Provide plenty of chew toys elsewhere, and use a bitter deterrent spray on the gate. Reinforce the “leave it” cue during training.