Why Can't You Shake Dr Brown Bottles? The Truth About Mixing Formula

The first thing you hear when you buy Dr Brown bottles is, “Don’t shake them!” But let’s get real—when your baby’s screaming at 3 am, that habit is hard to break. So why does everyone keep warning you?
The deal is, Dr Brown bottles use a special vent system that’s built to cut down on the air your baby swallows. Less air means less gas, less spit-up, and hopefully more sleep for everyone. That vent system is what sets them apart from regular baby bottles.
But here’s where it gets tricky. If you shake formula in the bottle, those special vents work against you. Instead of keeping air out of the milk, they pull it back in, and suddenly you’ve got a bottle full of froth and angry baby burps. Not what you want after all the effort you spend picking a fancy bottle that promises an “anti-colic” magic trick.
If you’re already in the habit of shaking bottles, don’t worry—it’s an easy fix. There’s a better way to mix up formula or breast milk without getting those nasty bubbles everywhere (and without turning feeding time into a chemistry experiment). I’ll show you how to do it right so your Dr Brown bottles actually do the job they’re meant to do. Ready to dump the bubbles for good?
- How Dr Brown Bottles Actually Work
- What Happens If You Shake the Bottle?
- Problems Caused by Air Bubbles
- The Right Way to Mix Formula
- Fixes If You Accidentally Shook the Bottle
- Bonus Tips for a Fuss-Free Feeding
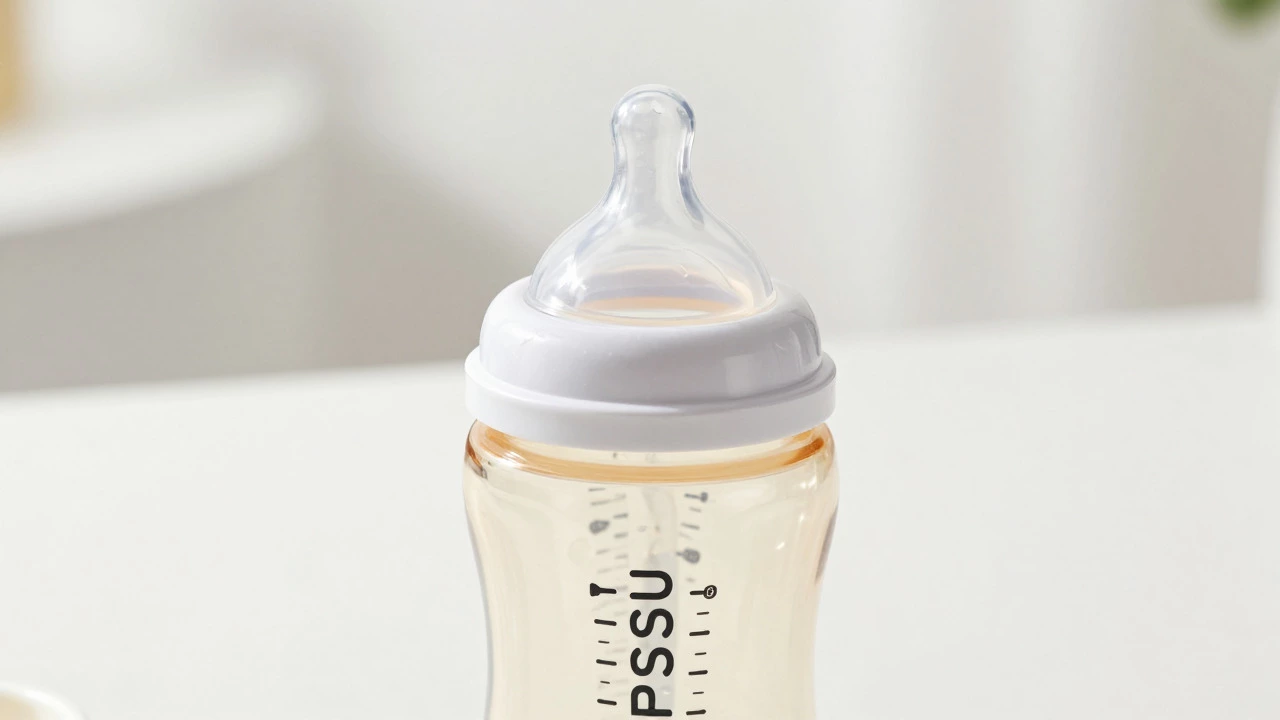
How Dr Brown Bottles Actually Work
It’s not just hype—Dr Brown bottles have a pretty clear difference from your regular baby bottles: it’s all about that blue internal vent. This part is basically what makes these bottles special for picky or colicky babies. Here’s what’s going on inside.
The vent system runs from the nipple collar down to the bottom of the bottle. When your baby sucks, the system lets air flow into the bottle through the vent instead of forcing it into the milk or formula. That way, you get almost no bubbles in the liquid your baby is actually drinking. If you check out the stats, Dr Brown’s brands themselves share that their bottles cut down on burping, spit-up, and gas in infants by more than half compared to bottles without vents.
| Feature | Regular Bottles | Dr Brown Bottles |
|---|---|---|
| Internal Vent System | No | Yes |
| Reduces Air in Milk | No | Yes |
| Helps Prevent Colic | Rarely | Frequently |
So what does the vent actually do for your baby? Fewer air bubbles mean less swallowed air, so you’ll probably notice your little one burps less and spits up less often, especially if they tend to be gassy. The company’s vent system has gotten plenty of shout-outs for helping with feeding issues, especially for preemies or babies struggling with reflux.
Here’s the catch. The vent system only works well if you use the bottle right. Once air gets mixed into the liquid (like from shaking), the vent can end up pulling those bubbles straight down into the milk. Suddenly, the feature becomes a problem, which is where people run into issues with the bottles.
The most important thing to remember: the Dr Brown bottles do their job when you use the vent system properly and avoid shaking. If you use them the same way you do regular bottles, you’re missing out on all the perks—and might even cause more bubbles and fussing than before.
What Happens If You Shake the Bottle?
So, what really goes down when you shake a Dr Brown bottles instead of stirring or swirling? The short answer: it gets way more bubbly than you bargained for. The vent system inside Dr Brown bottles is supposed to keep air out of your baby's milk, but shaking totally messes with that design.
When you shake the bottle, you force a ton of tiny air bubbles into the formula or breast milk. Because the vent system is open during mixing, those bubbles move right through the vent and stay trapped in the liquid. It’s like shaking up a can of soda—lots of fizz, only this time, your baby is the one dealing with the consequence.
- Your baby ends up swallowing more air with every gulp.
- All those bubbles can make the milk look frothy and weird.
- Air in the belly means you’ll spend double the time burping them (and hearing those angry cries from tummy pain).
If you’ve ever noticed foamy milk in the bottle, or your newborn is suddenly fussier or gassier after a feed, shaking could be the culprit.
| Effect of Shaking | What You See | What Baby Feels |
|---|---|---|
| Bubbles in formula | Foamy, cloudy milk | More gas, possible spit-up |
| Vent system messed up | Milk drips or leaks from vent | Harder to get a steady feed |
| Formula bits stuck | Clumps around the vent | Inconsistent flow, frustration |
Here’s the bottom line: Dr Brown bottles aren’t built for brute force. Shaking can undo all the things you paid extra for—like reducing colic and gas. It's not just some rule made up by bottle manufacturers; mixing the wrong way comes with actual downsides for your baby.
Problems Caused by Air Bubbles
Air bubbles aren’t just annoying—they can make bottle-feeding a nightmare for you and your baby. When you shake Dr Brown bottles with the vent system in, tons of bubbles get trapped in your baby’s milk or formula. And here’s why that matters: babies who swallow air often end up with gas, crankiness, and lots more spit-up. It pretty much cancels out the whole anti-colic promise these bottles offer.
Let’s break down what happens when air gets in the mix:
- Extra burping: The bubbles end up in your baby’s tummy, which means way more burping sessions and more time spent pacing the floor in the middle of the night.
- More spit-up: Babies with air in their bellies are much more likely to spit up. Studies show that excess air can increase spit-up volume by up to 30% compared to properly mixed bottles.
- Painful gas: Infants fed bubbly bottles may deal with bloating, gas pains, and loud tummy gurgles. That’s just hard on everyone.
- Foamy formula: Bubbles also make it tough for formula to dissolve well, leading to clumps and uneven feeding—which is a choking risk no one wants.
Here’s a quick comparison of air bubbles in bottles and their impact:
| Feeding Method | Gas Incidents per Day | Average Spit-Up Events |
|---|---|---|
| Hand-shaken (with bubbles) | 4-6 | 3-4 |
| Stirred or Swirled (few bubbles) | 1-2 | 1-2 |
It’s wild how much of a difference just a little shaking can make. Kids with gassy tummies really let you know about it, too—so it’s worth getting the mix right from the start.
The Right Way to Mix Formula
If you’re using Dr Brown bottles, shaking to mix formula will only cause trouble. The right way to mix formula keeps those annoying bubbles out and lets the bottle’s vent actually work. Here’s everything you need to do, step by step:
- Start by measuring the correct amount of water. It’s best to use warm water because it helps the powder dissolve faster—think around body temperature, about 98°F (37°C).
- Next, add the formula powder following the exact scoop size recommended on the container. Using too much or too little can really mess with baby’s tummy.
- Before you put in the vent system or nipple, tightly screw on just the bottle cap. Now here’s the move—gently swirl or roll the bottle between your hands. Don’t shake. You’re mixing, not making a smoothie. Swirling dissolves the formula without letting in tons of air.
- If you like, you can also use a clean spoon or a formula mixer wand—just make sure it’s sanitized each time.
- Once it’s all mixed with no big clumps, take off the cap, assemble the vent and nipple, and you’re good to go. A quick tap on the counter will help any tiny bubbles pop before feeding.
Here’s a quick cheat sheet comparing mixing by shaking versus swirling in Dr Brown bottles:
| Mixing Method | Air Bubbles | Formula Clumps | Baby Gas Issues |
|---|---|---|---|
| Shaking | Lots | Sometimes | More Likely |
| Swirling/Rolling | Very Few | Rare | Much Less Likely |
If you’re in a serious rush, you can pre-mix formula in a separate container and then pour it into the Dr Brown bottle. This is a lifesaver during nighttime feeds or when you’re out and about.
Bottom line: swirl, don’t shake, and you’ll get smoother bottles with way less drama—for you and for baby.
Fixes If You Accidentally Shook the Bottle
Messed up and shook your Dr Brown bottles out of habit? It happens to all of us—especially during those zombie-like night feeds. The good news: you can fix it, and your baby won’t have to deal with a gassy belly or a bottle full of foam for long.
Here’s what to do if you end up with a sudsy, bubbly mess inside your Dr Brown bottle:
- Let It Settle
Just leave the bottle sitting upright on the counter—with the vent still in and the cap on—for a few minutes. Most bubbles naturally rise to the top and pop on their own. Usually 2–5 minutes is enough to see a big difference. - Swirl Instead of Shake Next Time
Give the bottle a gentle swirl or roll it between your palms. This mixes the formula without whipping in so much air. It may take a few seconds longer but will save you a lot of burping time later. - Use a Spoon or Formula Mixer
For thick formula, stir with a sterilized spoon or use a formula mixing stick before you even pour it into the Dr Brown bottle. Less air gets in from the start. - Pop the Bubbles Manually
If you’re in a rush, you can tap the bottom of the bottle gently on the counter which pushes bubbles toward the top. Sometimes just loosening the cap helps the bigger bubbles escape faster.
Here’s a quick chart to show how long common fixes take to clear foam out of Dr Brown bottles:
| Fix | Average Time to Reduce Bubbles |
|---|---|
| Letting settle naturally | 2-5 minutes |
| Tapping bottom on counter | About 1-2 minutes |
| Loosening cap slightly | 1 minute |
| Stirring before pouring in | Barely any bubbles |
Remember, the vent system in Dr Brown bottles is pretty smart, but you’ll get the most out of it if you avoid shaking. If things get frothy, just pause and use one of these quick fixes. Your baby’s tummy (and your sanity) will thank you.
Bonus Tips for a Fuss-Free Feeding
Getting your feeding routine smooth can feel impossible some days, especially with Dr Brown bottles and their extra parts. Good news: a few tweaks can save your sanity and prevent a meltdown—yours or your baby’s.
- Dr Brown bottles work best if you make sure the vent and all parts are totally dry after cleaning. Any leftover water can leak into milk and make a mess. If you’re prepping bottles in advance, air dry the bits on a clean towel.
- Always fill the bottle with formula or breast milk before you put the vent system together. If you assemble it first, you’ll get formula stuck up in the vent—which means more cleaning later (and possibly clogs).
- If you’re out and about, bring a small spill-proof formula dispenser. Pre-measured formula and pre-filled bottles of water make all the difference when you need to mix up a bottle fast, no kitchen required.
- For night feeds, prep bottles using cooled, boiled water and keep them ready on your nightstand. Just add the formula, swirl, pop in the vent, done. No midnight trips to the sink.
- Tired of losing small parts in the dishwasher? Use a mesh laundry bag. Toss all the little bits in there, zip it up, and you’ll never have to dig around your dishwasher for missing vents again.
- When it comes to warming bottles, don’t microwave—hot spots make things risky. Use a bottle warmer or a mug of warm water. If you notice any leaks, double check that the vent insert and reservoir are firmly in place and not over-tightened.
Here’s a quick stat about what parents really care about—easy clean up and less crying. A 2023 survey of new parents found that 8 out of 10 said a bottle system that cuts down on gas and spit-up made feeding less stressful. No wonder Dr Brown bottles are a favorite, even if they’re a little fiddly.
| Tip | Reason |
|---|---|
| Let vent parts dry before use | Stops leaks and formula buildup |
| Fill bottle before assembling vent | Prevents formula in the vent |
| Pre-measure formula for outings | Makes feeds quicker on the go |
| Use a mesh bag in the dishwasher | Keeps all small parts together |
| Avoid microwaving bottles | Prevents uneven heating and burns |
Small tweaks, huge difference. Try these tricks and you’ll have fewer spills, faster feeds, and way less stress. If you mess up? Don’t sweat it—the next feed is always a chance to get it right.